 Got curious about the new kid on the block named Magisk that is making names to compete with our old school SuperSu so I did some research and need first to uninstall xposed framework.
To unroot I need to do some wipe data/factory reset to get rid of my current SuperSu then tried to reflash my stock recovery.img then tested the adb sideload to root my device but failed.
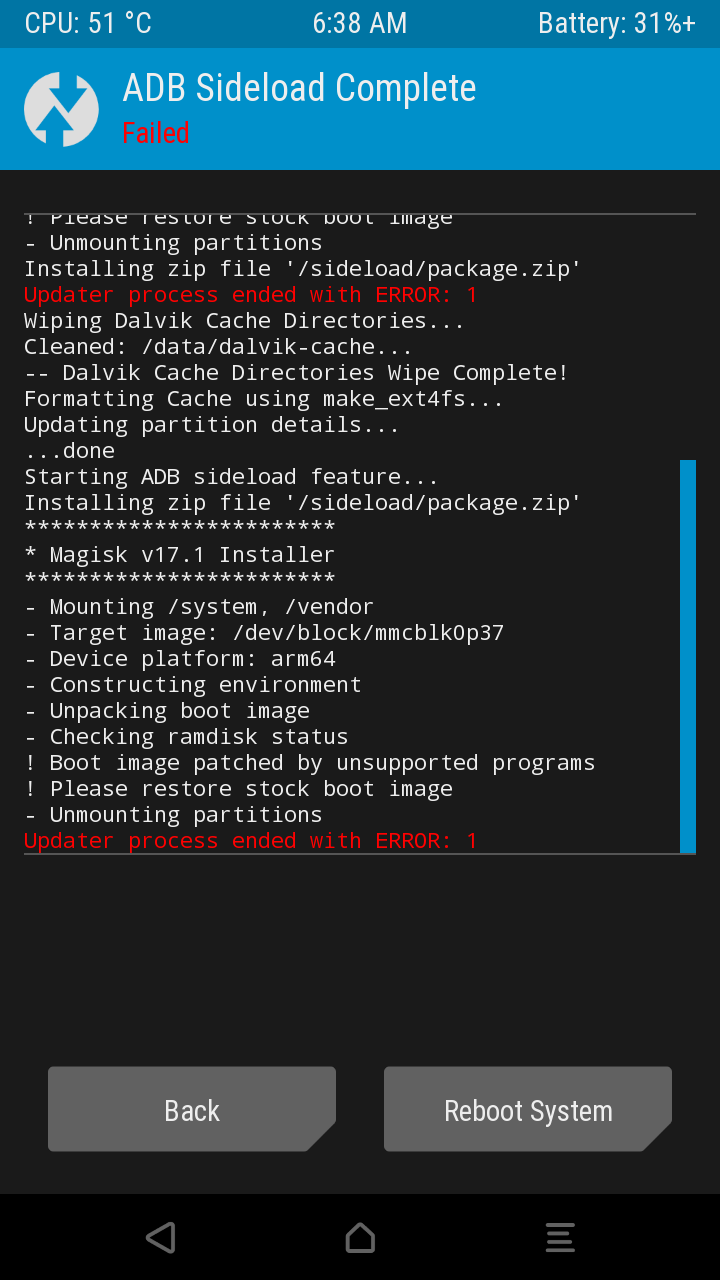
I tried to flashback my TWRP custom recovery.img and tried again the adb sideload command but still getting error 1 and say to flash back the stock boot.img.
After flashing my stock boot.img back and with a custom recovery TWRP seem to be successful but there is only one thing after flashing the zip via adb sideload, my device seem not to proceed to the home menu and got stuck from Asus logo and more than 30mins have passed it won't push through (bootloop).
Here's the sample error if you are not into stock boot.img that's why just downgrade and upgrade to Marshmallow to avoid such error even after you flash your stock boot.img there would might be some conflict from your system created by the previous SuperSU that might cause some bootloop.
Best to have a clean flash of firmware from Marshmallow then flash TWRP to install the zip or do it via adb sideload for better results.
I did wipe all data including system, internal storage but still no success, until I got to the right process to flash back to Lollipop version, then upgraded to Marshamllow via adb sideload command, then flash a custom recovery.img which is TWRP then tried again to flash Magisk.zip via adb and it went well.
For those who wish to use adb sideload you may proceed but once you have the TWRP already with a fresh install of stock firmware Lollipop to Marshmallow you may try to install the Magisk.zip directly from TWRP.
Things Needed:
1. Android M firmware zip file (latest)=Version WW-21.40.1220.2196
2. Android L firmware zip file (latest)=Version WW_1.17.40.1531
3. Stock recovery.img (these stock recovery.img is taken from the latest Android L with version WW_1.17.40.1531)
4. twrp-3.0.2-5-Z00L.img here (custom recovery)-you may rename to twrp.img
5. Magisk.zip and Magisk manager.apk
6. ADB installed in PC
Let's try to breakdown again the steps to successfully root your device with Magisk using adb
STEPS:
1. If you are in Marshmallow version with the old Supersu and Xposed framework installed with TWRP, then best to downgrade first to Lollipop version, make sure you have enabled USB debugging
2. Once downgraded to lollipop, instead of rebooting your device just scroll to "apply update from adb" and let's proceed to upgrade to marshmallow
3. Congrats! But before that we can check if we have root access
4. You may now install the Magisk Manager apk to add your modules,
Until next post...
Share with friends if you found this tutorial helpful.
Enjoy!
After flashing my stock boot.img back and with a custom recovery TWRP seem to be successful but there is only one thing after flashing the zip via adb sideload, my device seem not to proceed to the home menu and got stuck from Asus logo and more than 30mins have passed it won't push through (bootloop).
Here's the sample error if you are not into stock boot.img that's why just downgrade and upgrade to Marshmallow to avoid such error even after you flash your stock boot.img there would might be some conflict from your system created by the previous SuperSU that might cause some bootloop.
Best to have a clean flash of firmware from Marshmallow then flash TWRP to install the zip or do it via adb sideload for better results.
For those who wish to use adb sideload you may proceed but once you have the TWRP already with a fresh install of stock firmware Lollipop to Marshmallow you may try to install the Magisk.zip directly from TWRP.
Things Needed:
1. Android M firmware zip file (latest)=Version WW-21.40.1220.2196
2. Android L firmware zip file (latest)=Version WW_1.17.40.1531
3. Stock recovery.img (these stock recovery.img is taken from the latest Android L with version WW_1.17.40.1531)
4. twrp-3.0.2-5-Z00L.img here (custom recovery)-you may rename to twrp.img
5. Magisk.zip and Magisk manager.apk
6. ADB installed in PC
Let's try to breakdown again the steps to successfully root your device with Magisk using adb
STEPS:
1. If you are in Marshmallow version with the old Supersu and Xposed framework installed with TWRP, then best to downgrade first to Lollipop version, make sure you have enabled USB debugging
- simply save the Version WW_1.17.40.1531 (L) zip file and the stock recovery.img in adb folder (you may rename stock recovery to recovery.img)
- connect your device to your PC
- from adb folder hold shift+right click of your mouse and point to any blank space to open new command window
- now type from your command window the following code "adb reboot bootloader" to boot in fastboot mode then type "fastboot flash recovery recovery.img" followed by "fastboot boot recovery.img " and will boot you into your stock recovery
- once it boot into recovery from your device use volume keys to scroll to "apply update from adb"
- type now from command window "adb sideload Version WW_1.17.40.1531.zip" and hit the enter key (you may rename this zip files to your liking for fast encoding than typing the whole code like updateL.zip etc)
- wait as it completes the installation and check confirmation from your screen
2. Once downgraded to lollipop, instead of rebooting your device just scroll to "apply update from adb" and let's proceed to upgrade to marshmallow
- simply save the Version WW-21.40.1220.2196 (M) zip file and the custom recovery.img (twrp) plus your Magisk zip in adb folder
- type now from command window "adb sideload Version WW-21.40.1220.2196.zip" and hit the enter key (you may rename this zip files to your liking for fast encoding than typing the whole code like updateM.zip etc)
- wait as it completes the installation and check confirmation from your screen
- now type from your command window the following code "adb reboot bootloader" then "fastboot flash recovery twrp.img" followed by "fastboot boot twrp.img " and will boot you into your custom recovery twrp.
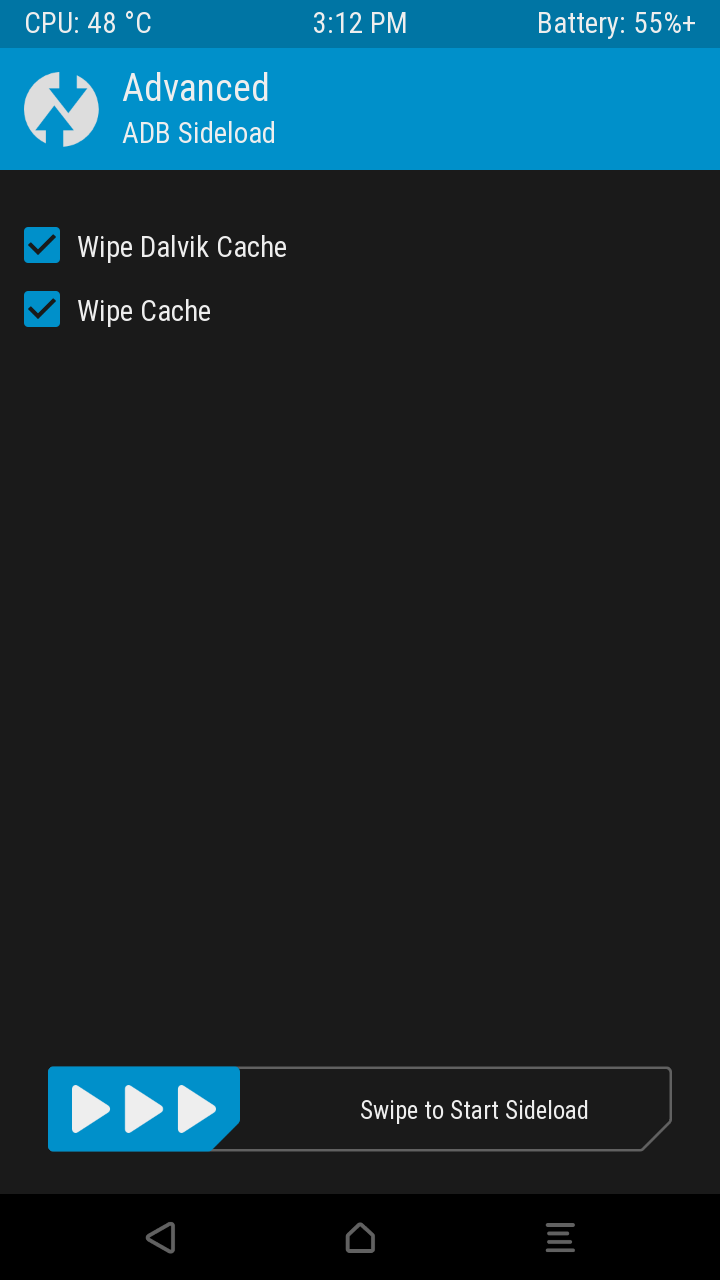
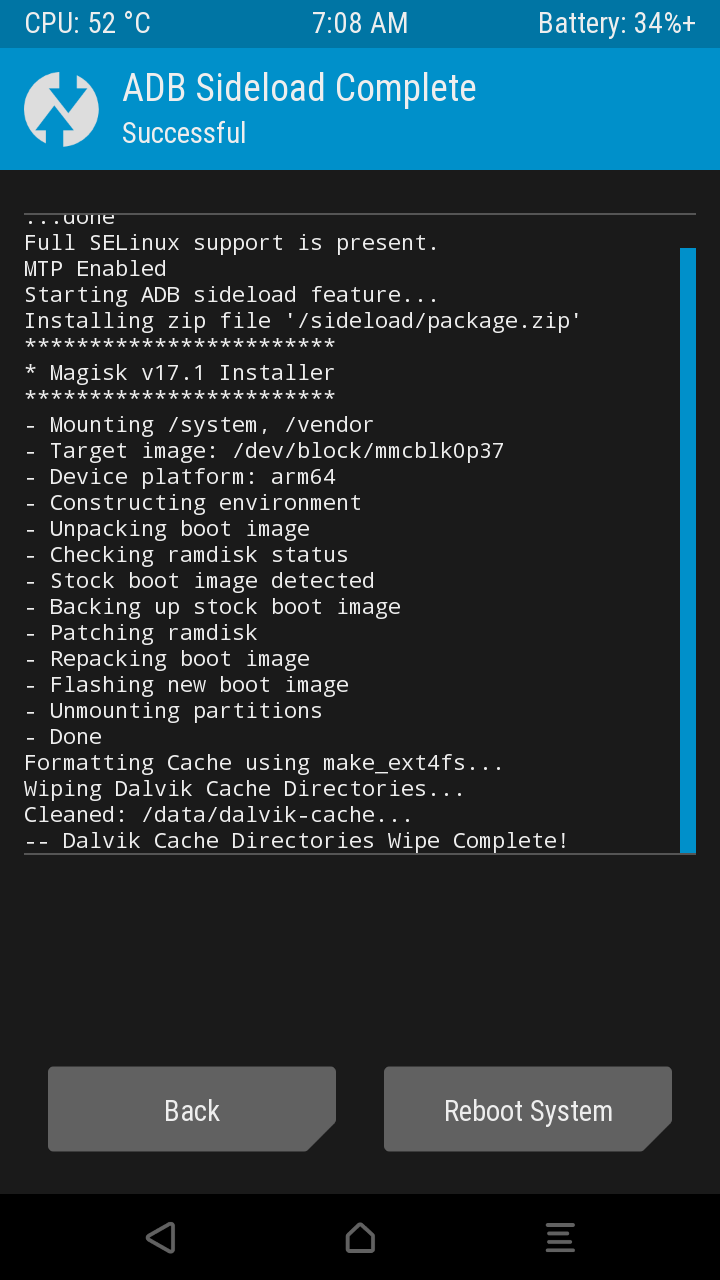
- now from device click advanced tab and select adb sideload, you may tick on wipe dalvik/cache before you swipe
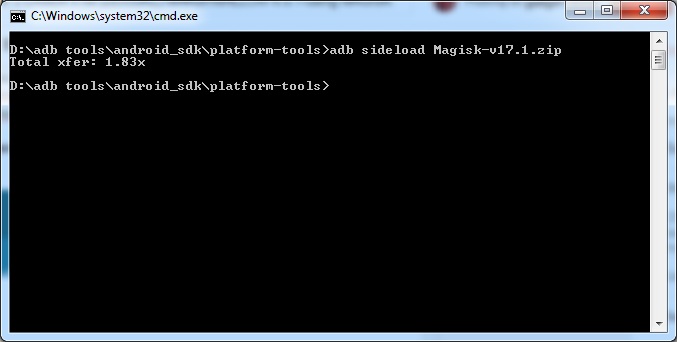
- type now from command window "adb sideload Magisk.zip" and hit the enter key
- wait as it will install the zip file and say successful on your screen and you may reboot system
4. You may now install the Magisk Manager apk to add your modules,
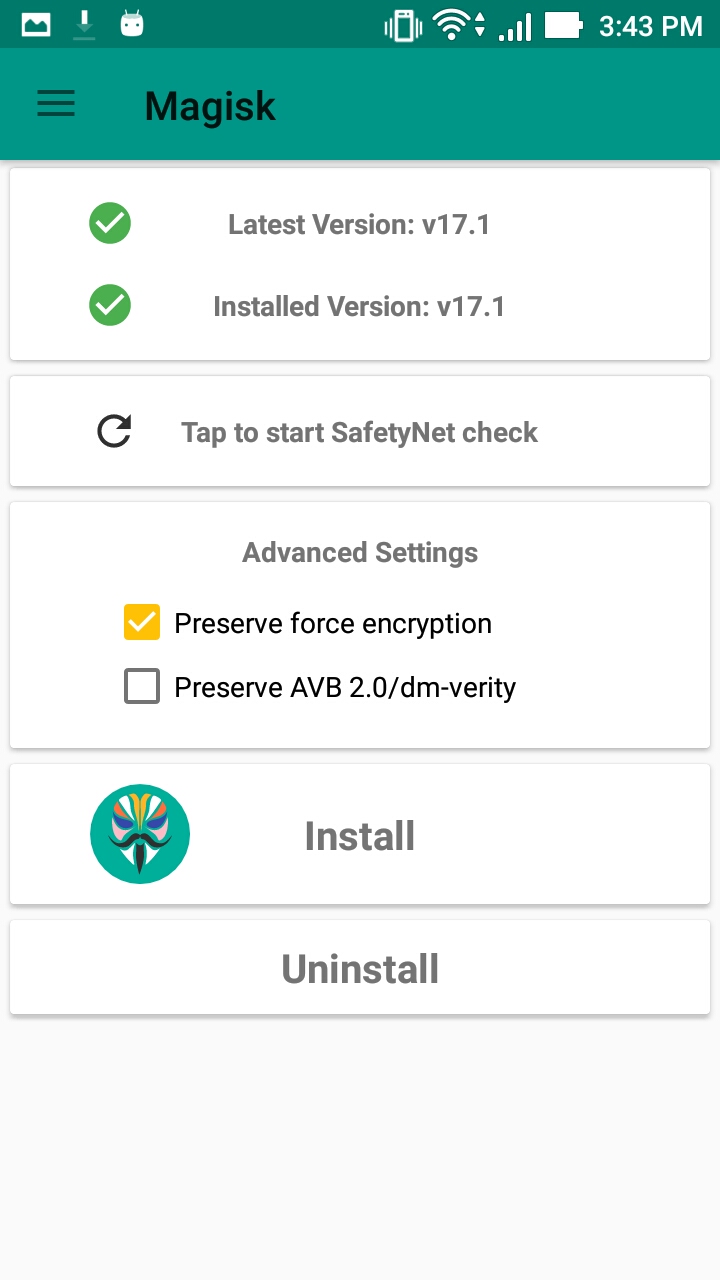 |
| Magisk_Manager_app |
Until next post...
Share with friends if you found this tutorial helpful.
Enjoy!


For more info visit this link https://www.stelladatarecovery.com/exchange-edb-recovery.html
ReplyDelete